V 1.5
Pokona loopyPio!
Mobile App - Learn piano by making loops!
24 min read 09/02/2024
Prologue & MVP Overview
Last year, Pokona aimed to build a more intuitive app to learn piano and music theory by creating a sequencing piano inspired interface that allowed users to record the notes they played on multiple tracks, and by layering melodies and beats they would create a repeating short song or 'loop', if you like. The slightly peculiar result is something in between a Digital Audio Workstation and a typical piano app. Although the aim was to provide the functionality of a sequencing piano or 'loopstation' on a mobile device to reduce cost for the user by not having to buy a physical device, loopyPio! seems to have failed to find product-market fit and retain its users. The problems that caused this are discussed in more detail below. The user feedback and lessons learned from the first release have led to a change in concept for loopyPio! and a different plan for subsequent releases.
User Interface
The user interface offers a selection of different instruments, and control of tempo and the length of the loop. There is also a metronome and quantization feature to help the user keep time. These features are split across the main Piano UI and Settings.
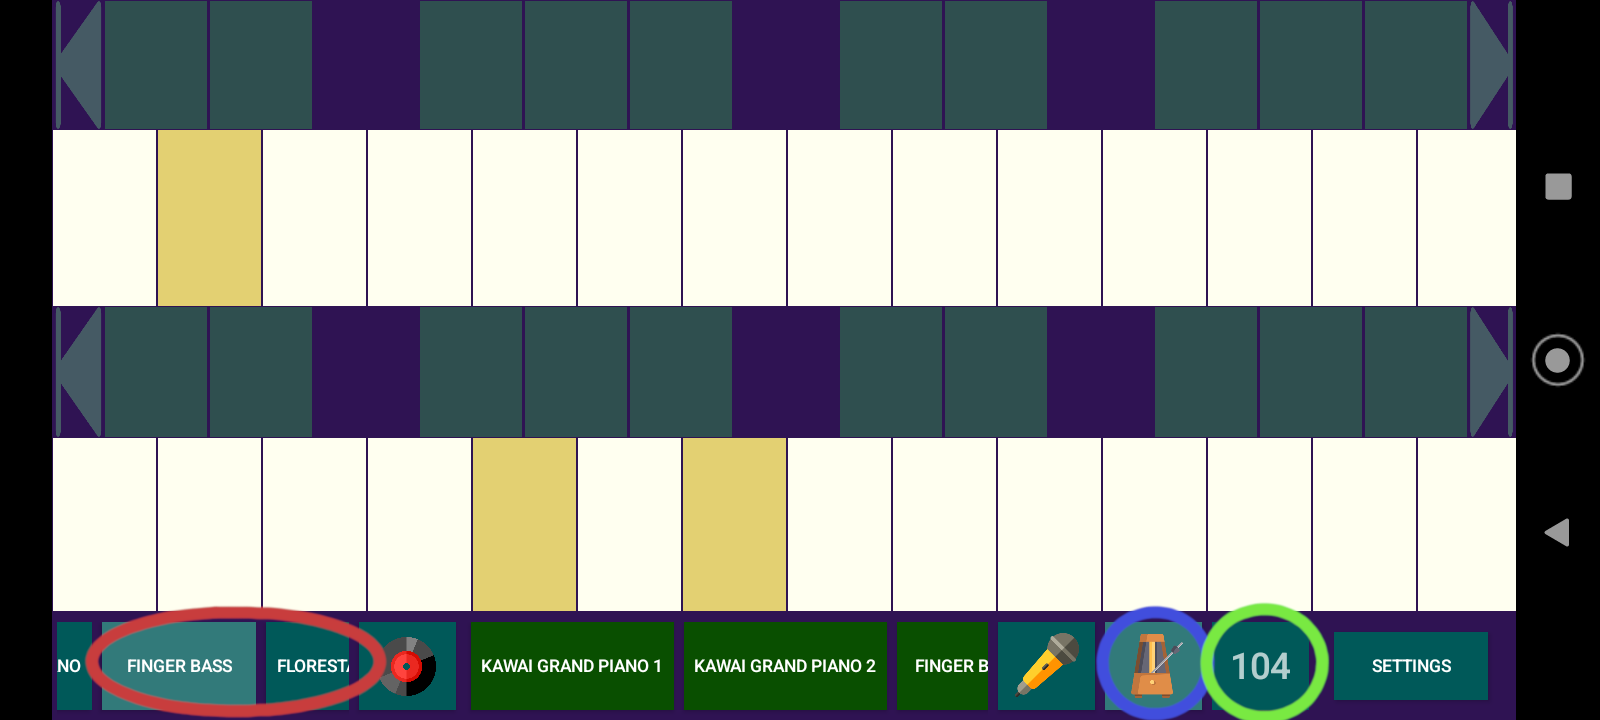
Piano UI
Piano Keys:
The decision to not have typical overlapping piano keys aimed to make loopyPio! more ergonomical and practical, but users said this design was confusing and unintuitive. This was exacerbated by the piano key colour scheme and 'scale highlighting' feature.
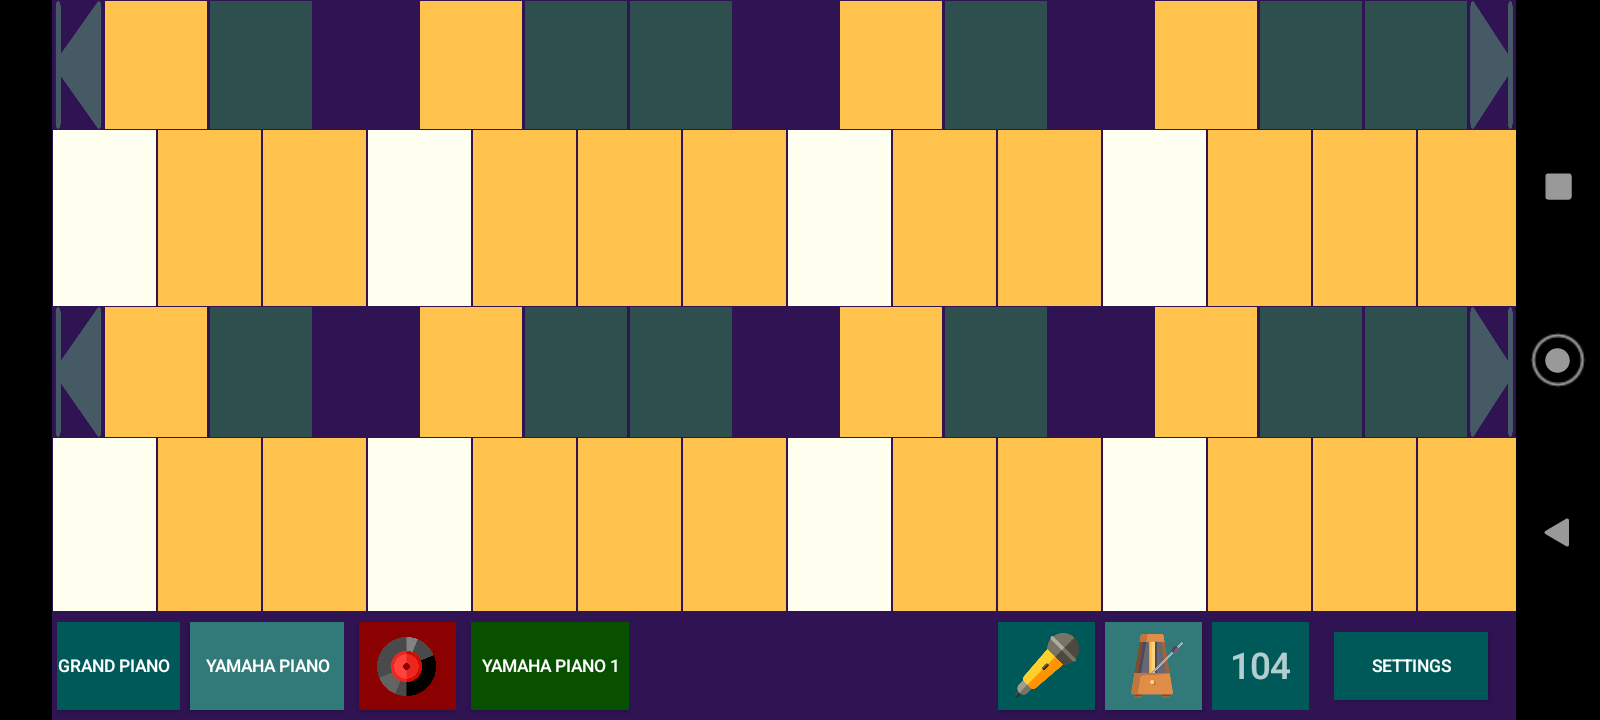
The next release will have a typical keyboard design and will simply use a darker version of the current key colour for the highlighted keys.
Allowing users to choose piano key colours combined with loopyPio!'s default 'dark-mode' colour scheme created a messy and ununified UI. The next release will offer a more typical colour scheme.
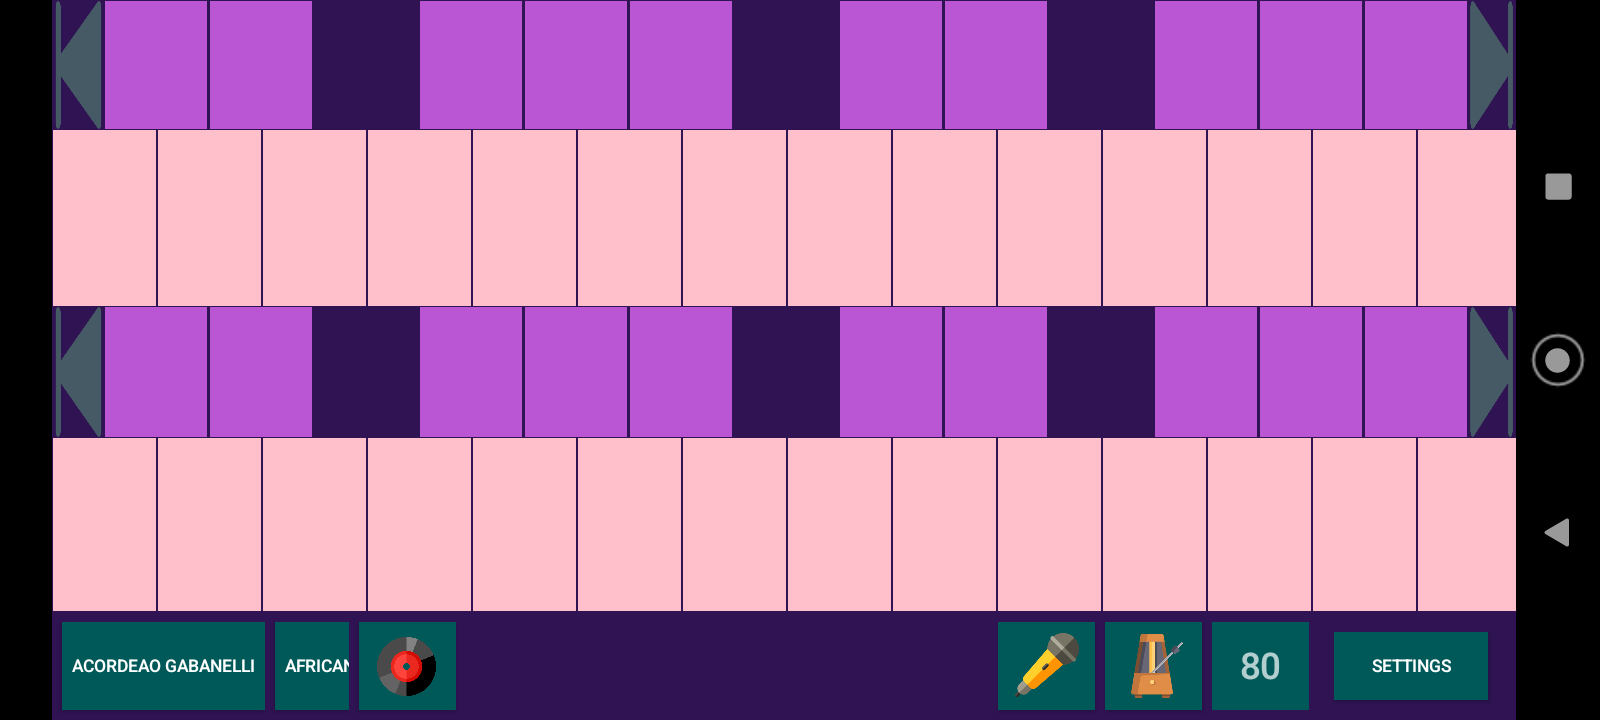
One user commented that rectangular piano keys looked dated. This design was made to maximise the surface area of the piano keys but perhaps a more modern design is more valuable.
The octave up/down arrows on either sides of the keyboards could be replaced by drag and scroll functionality that slides the entire keyboard left and right.
Loop Menu:
The decision to have the loop menu at the bottom rather than the top of the screen was made to prevent the user from accidentally opening their device's notification menu. This will remain in the next release.
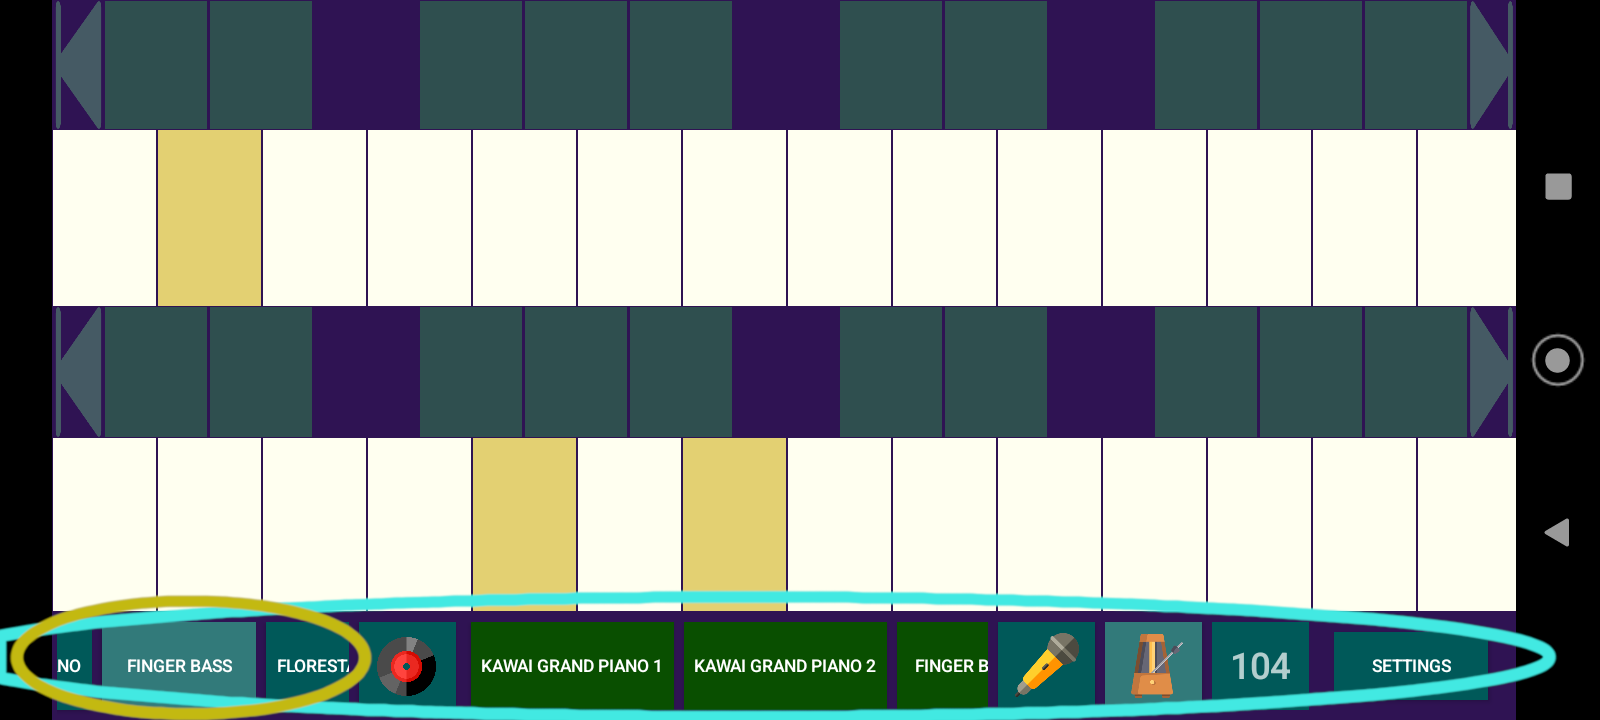
The use of a horizontal scroll menu for instrument selection prevents overlap with the keyboard, but it has been said that this is unintuitive. A vertical scroll menu might be used in the next release.
Currently, tracks are displayed in buttons in a horizontal scroll menu.
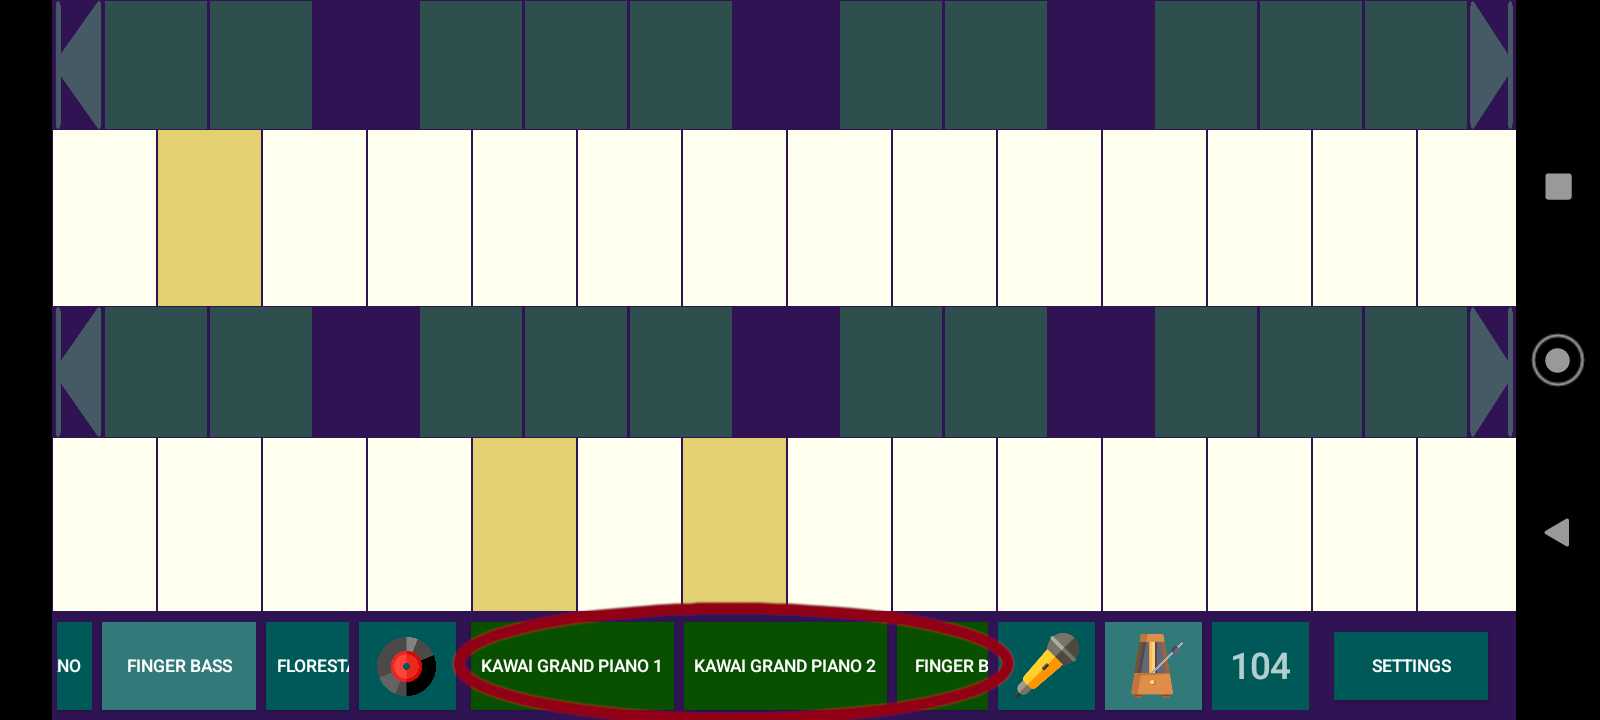
Control is limited to muting (short press) and deleting (long press). This design is practical and intuitive but volume control for each track is crucial as the SoundFont files used for the instruments were found to be irregular in volume. Hence, this could be implemented by allowing the user to raise and lower each track's volume by dragging up and down inside the track's button, respectively.
Settings
Horizontal Scroll Menus:
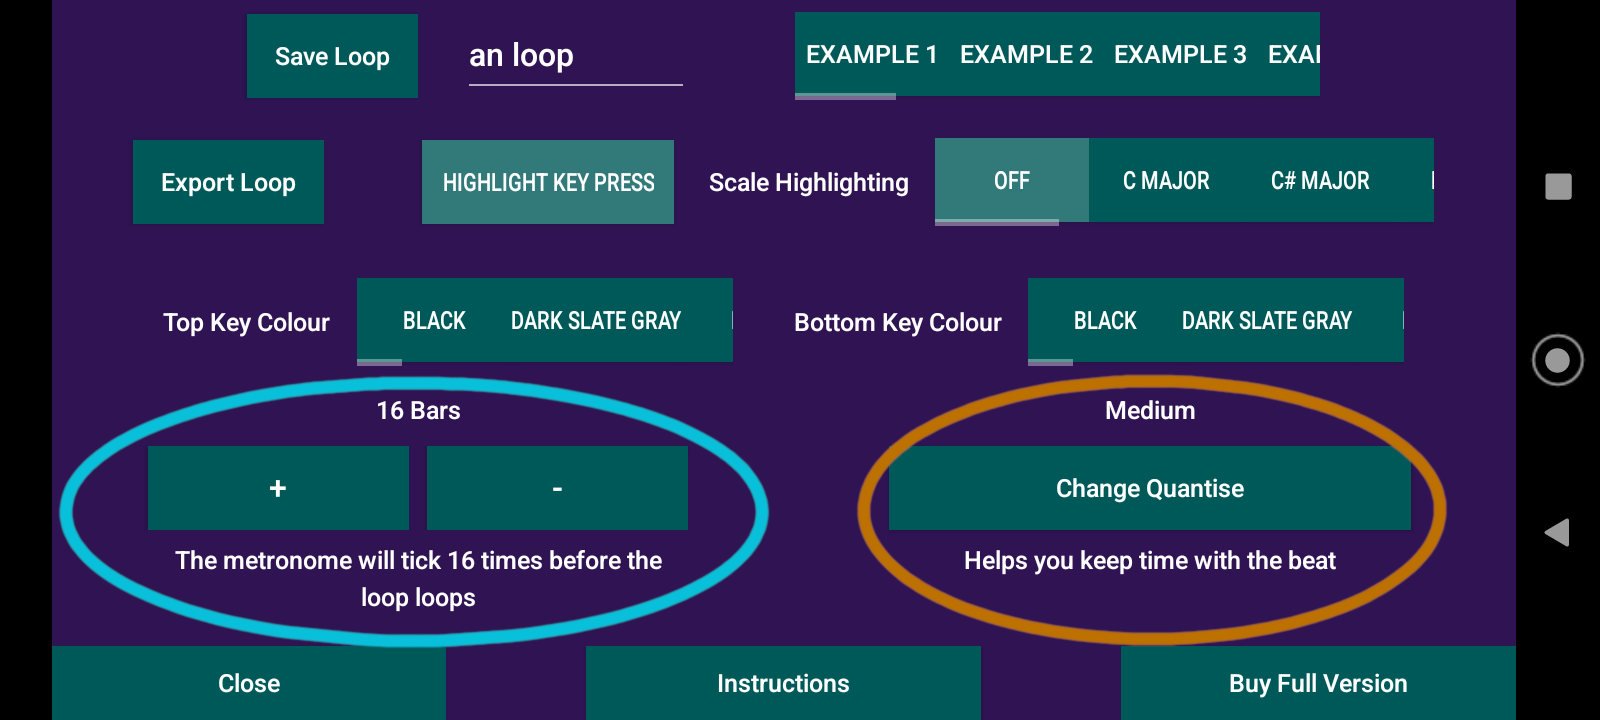
Settings such as Quantise and Loop Length will be placed inside a vertical scroll menu for a more typical arrangement, where others will be removed.
Loop Save Menu:
Buttons are used to display example loops and user made loops in a horizontal scroll menu. The next release will utilise an independent view with all loops listed in a table in a vertical scroll menu with more information about each loop such as length and tempo. This independent view will also include other user's loops and online leaderboards as part of the Platformisation & Gamification of loopyPio!

Colour Scheme:
The default 'dark-mode' will be be made optional.
Export Loop:
This feature will be removed and replaced by the Platformisation & Gamification of loopyPio!
Instructions:
This will remain but an introductory tutorial is also required. One of the main reasons why loopyPio! failed to retain it's users is likely the steep learning curve and, in general, the difficulty of using the app. Although designed to be maximally intuitive and offering helpful features for learning such as scale highlighting and example loops, this was clearly still not enough to provide a smooth learning experience for users. Hence, the next release should provide a sufficient UI controls and music theory tutorial that guides the user around the app, teaching them how to make a simple loop.
Buy Full Version:
This will be replaced by the in-game token system found in the user's account and settings view.
Implementation
The app uses Java for the UI and C++ for fast native processing. Input is detected in the Java layer and sent down through the Java Native Interface to the C++ layer, resulting functionality is returned through the JNI to the Java layer to update the UI. Audio processing and playback is done by Google's Oboe Audio Library. The instrument sounds are created by playing SoundFont files through the excellent Tiny Sound Font Library. Both libraries are necessary for loopyPio! to work and are integral in the app's native code.
Flutter for the Next Release
Flutter for front end:
The decision to use Flutter for the front end code comes from the severe issues encountered with UI component spacing consistency and organisation between Java and XML files. The resulting UI also lacked cohesion and aesthetics as discussed earlier. Using Flutter's excellent nested widgets structure and consistent styling for components would result in a far better UI. This is known in fact because Linguini AI is being developed with Flutter and it is a pleasure to use. For example, rounded piano key corners could easily be styled with Flutter.
Using Flutter also comes with the benefit of cross-platform compatibility, at least for the UI. The native audio and input processing code would need to be separately implemented for iOS and Android platforms as low-latency is required. Oboe library could still be used for Android, however, recent attempts to get it working on a Flutter app have been unsuccessful. If you know how to do this, then please email contact@pokona.org, your knowledge would be much appreciated! The alternative would be using the AAudio C API alone. iOS has its own low latency audio library.
Java Native Interface:
Sending input data through the JNI did not significantly increase latency of piano key presses. However, The code and learning curve required to implement data transfer functionality with the JNI was immense. There is also a concern that memory leaks and issues with threads appear in the JNI as control of objects is passed from the Java Virtual Machine to the C++ layer. If the next release uses Flutter for it's front end the JNI would not be required as Flutter has platform channels to communicate between dart code and native code. Assuming this method would have the same or lower latency.
Tiny Sound Font Library
This will still be used if SoundFonts are, however, the availability and quality of SoundFonts was found to be low. Also, they are massive, in fact, something like 75% of loopyPio!'s package size was SoundFont files!
Another file type could be used for instruments but a far better solution would be to store files in a database, and load them into a limited cache only when the user selects the instrument. This would greatly reduce app package size.
Loop Functionality Implementation
Looping SoundFonts:
To allow for the loop tempo to be changed without changing the pitch of the instruments, an advanced looping system was designed. The system would record piano key presses into positions in an array and then use the Tiny Sound Font library to play them again on the next loop. If you are interested in a full walkthrough of the looping system or any implementation previously discussed, email contact@pokona.org. The looping system will likely remain the same in the next release.
Looping Microphone Audio:
A major feature of loopyPio! is voice/sound recording using the device microphone. To add microphone recorded data to tracks for looping, a fundamentally different looping system had to be designed. Using both systems reduced the audio quality, app stability and caused code bloating. The next release will likely not include microphone recording as a feature, as it is secondary to the main aim of loopyPio!; to allow users to learn piano by making loops.
Because microphone audio is an analog signal and returns a very large float array when recorded, it is difficult to align it to the instrument looping system and impossible to to change the tempo without changing the pitch without a audio time stretching algorithm. These are proprietary or otherwise too complex and time consuming to implement. Because of this, currently, microphone audio pitch changes with tempo. This produces a comedic nightcore effect, if you like, but significantly increases code complexity and is sometimes too CPU intensive. Sometimes, less is more.
Save Loop Implementation:
Loops are currently saved in local app storage, this will be replaced by storing loop data in user account storage in a database.
Export loop Implementation:
Functionality will be removed as users will be able to post their loops online as part of loopyPio!'s Platformisation & Gamification.
Platformisation & Gamification
One problem that became quickly evident from loopyPio's Google Ads advertising campaigns is that users would use loopyPio! for a few weeks and then lose interest. This could be due to the lack of a social aspect to the app. Users could be given incentive to make loops and improve their piano skills if they could post loops to a online leaderboard, where other users could listen to them and vote and comment on them. The dream would be that users kept improving their musical skills by competing to compose the best and highest voted loops on the leaderboards.
Better advertising & presentation is also needed:
An advert that more clearly explained how to use the app would increase conversions.
Designing a better logo.
Creating video tutorials and ads for social media accounts.
Well there you have an overview of the plan for loopyPio!'s next release.
Contact
contact@pokona.orgPokona Limited London, UK
Copyright © 2024 Pokona Limited. All rights reserved.